Back to CapitalForecastDirect Main Menu
Adding Attachments to Needs
In CapitalForecastDirect you can attach files or hyperlinks to a Need. Any Need with an attachment will appear in your Needs list with a paperclip icon ( ).
).
How to Add Attachments to Needs
- Click the Needs tab.
- Select the desired Need by clicking on the Need ID.
- Scroll down to the Attachments section and click Add New Attachment.
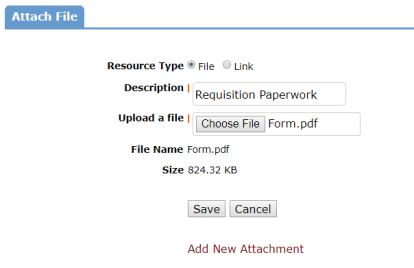
Adding a File Attachment
- In the Attach File window, make sure the File Resource Type is selected.
- Type the file Description.
- Click the Choose File button to select the file from your computer. *Note: The size limit for attachments is 5MB.
- Click Save to add the file attachment to the Need.
- Once the file has been added to the Need, you can edit the file by clicking the pencil icon (
 ) or delete the file by clicking the delete icon (
 ).
).
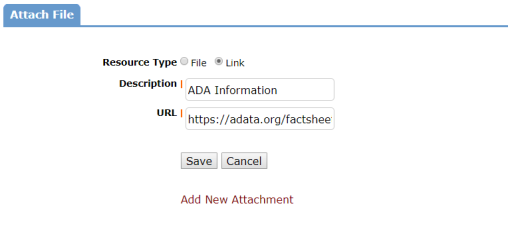
Adding a Hyperlink
- In the Attach File window, choose the Link Resource Type.
- Type the link Description.
- Enter the link URL.
- Click Save to add the link to the need.
- Once the link has been added to the Need, you can edit the link by clicking the pencil icon () or delete the link by clicking the delete icon ().